Create a new project in the database
The project creation app in the Clinical Knowledge Graph was designed to make the process straightforward and user-friendly. To create a project, please follow the steps below.
Neo4j
Open neo4j desktop
Start the database
Terminal
In one terminal window:
Activate the virtual environment (if created beforehand)
$ source /path/to/virtualenvironment/bin/activate;
Start a redis-server:
$ redis-server
Warning
If redis-server is not found, install with brew install redis (Mac) or sudo apt-get install redis-server (Linux).
Warning
On Windows, redis-server should be installed by default (to check, go to start menu > services.msc > Redis). If that is not the case, go to https://github.com/microsoftarchive/redis/releases, download the latest release installer (.msi file), and follow the installation instructions. Let all options as default but remember to select Add the Redis installation folder to the PATH environment variable.. To start a redis-server, make sure it is not running in ``services.msc``, and run in the command prompt: C:”Program Files”Redisredis-server
Note
C:\"Program Files" can be replaced with the correct path where you installed Redis from the installer (.msi file).
In two separate terminal windows:
Navigate to
report_managerin both of them
$ cd CKG/src/report_manager
Start a celery queue from the report_manager directory, in each window:
Default queue
$ celery -A worker worker --loglevel=DEBUG --concurrency=3 -E
In Windows, this corresponds to:
> celery worker -A worker --pool=eventlet --loglevel=DEBUG --concurrency=3 -E
Compute queue - Report generation
$ celery -A worker worker --loglevel=DEBUG --concurrency=3 -E -Q compute
To start this queue on Windows, please run:
> celery worker -A worker --pool=eventlet --loglevel=DEBUG --concurrency=3 -E -Q compute
In a fourth terminal window:
Run the report manager index app:
$ cd CKG/src/report_manager
$ python index.py
This will print some warnings, which should be okay.
Warning
Make sure that your virtual environment is always activated in each terminal window, before running any other command.
Browser
Copy the url
http://localhost:5000/into a web browser and you will be directed to a login page.Enter your username and password
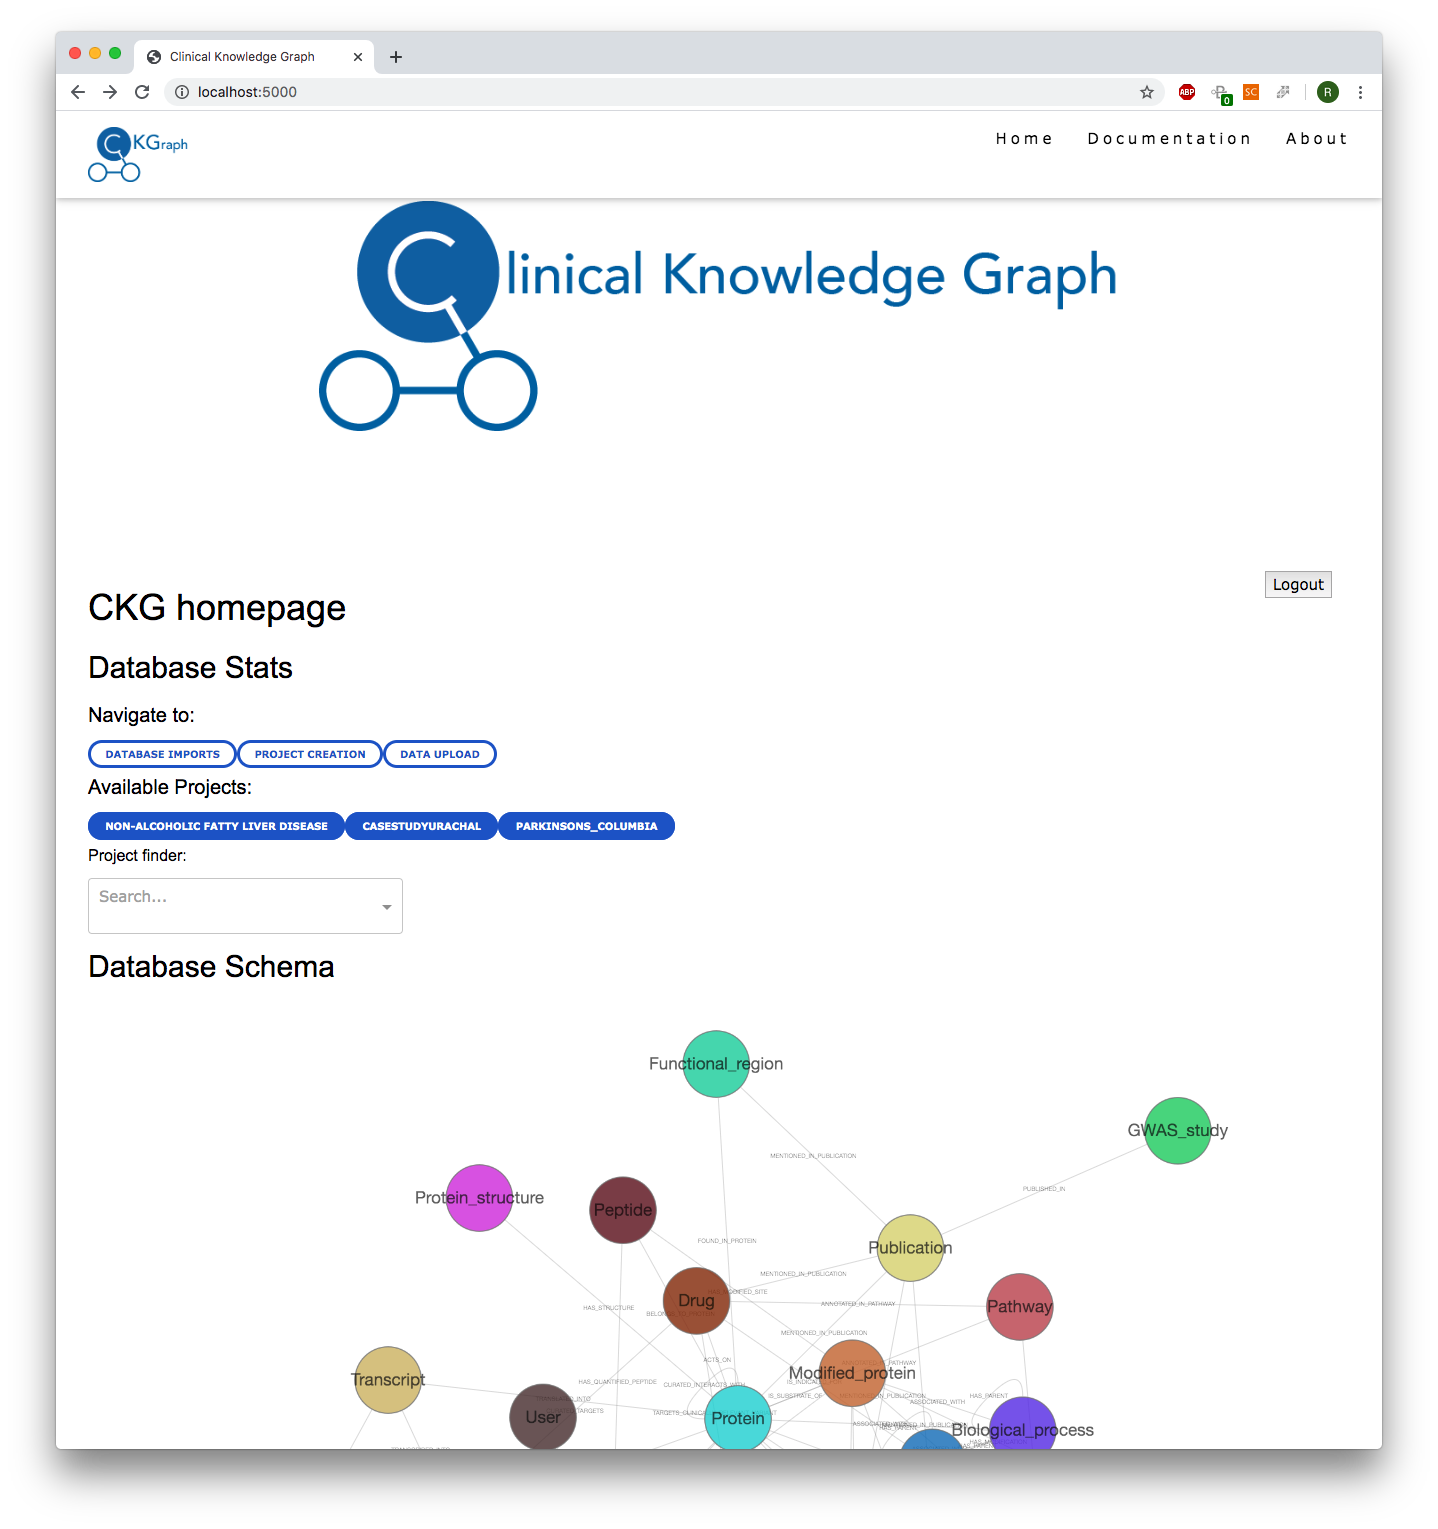
This action will redirect you to the CKG home page app. From here, you can navigate to different applications, including the “Project Creation” app.
Note
Username and password will be authenticated in the CKG database. For this reason, you should have been created as a new user in the database before this step.
Project creation
From the CKG app home page, you can navigate to the project creation app by clicking PROJECT CREATION or pasting the url http://localhost:5000/apps/projectCreationApp in the browser.
Project Creation App
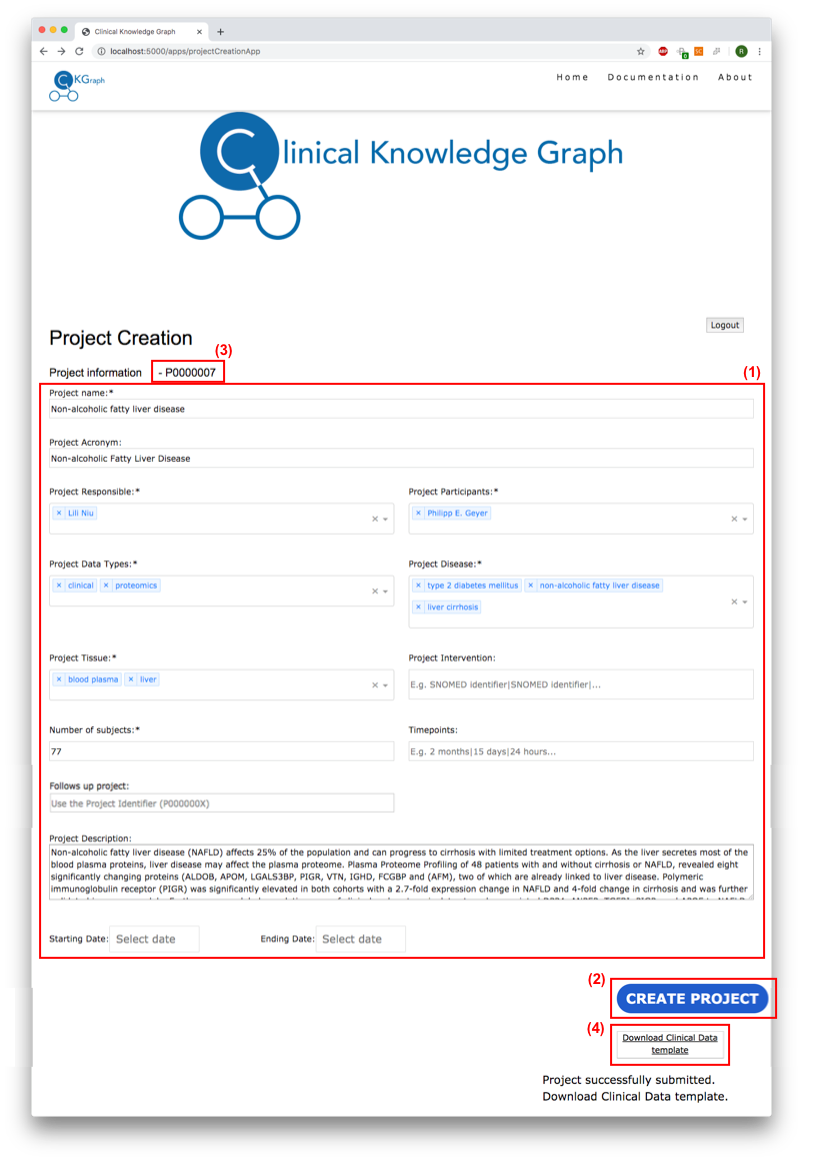
Once you have been redirected, please fill in all the information needed to create a project. This includes all the fields marked with * (mandatory). (1)
After all fields are filled in, please revise all the information and press Create Project. (2)
The page will refresh and once finished, the project identifier will be depicted in front of the Project information header. (3) Use this identifier to search for data related to your project.
At this stage, and if your project has been successfully created in the database, a new button will appear and the message will instruct you to download a compressed file with the experimental design and clinical data template files. To do so, please press the button “Download Clinical Data template”. (4)
Note
Each field, with the exception of Project name, Project Acronym, Number of subjects, Project Description, Starting Date and Ending Date, can take multiple values. Select the most appropriate ones for your specific project.
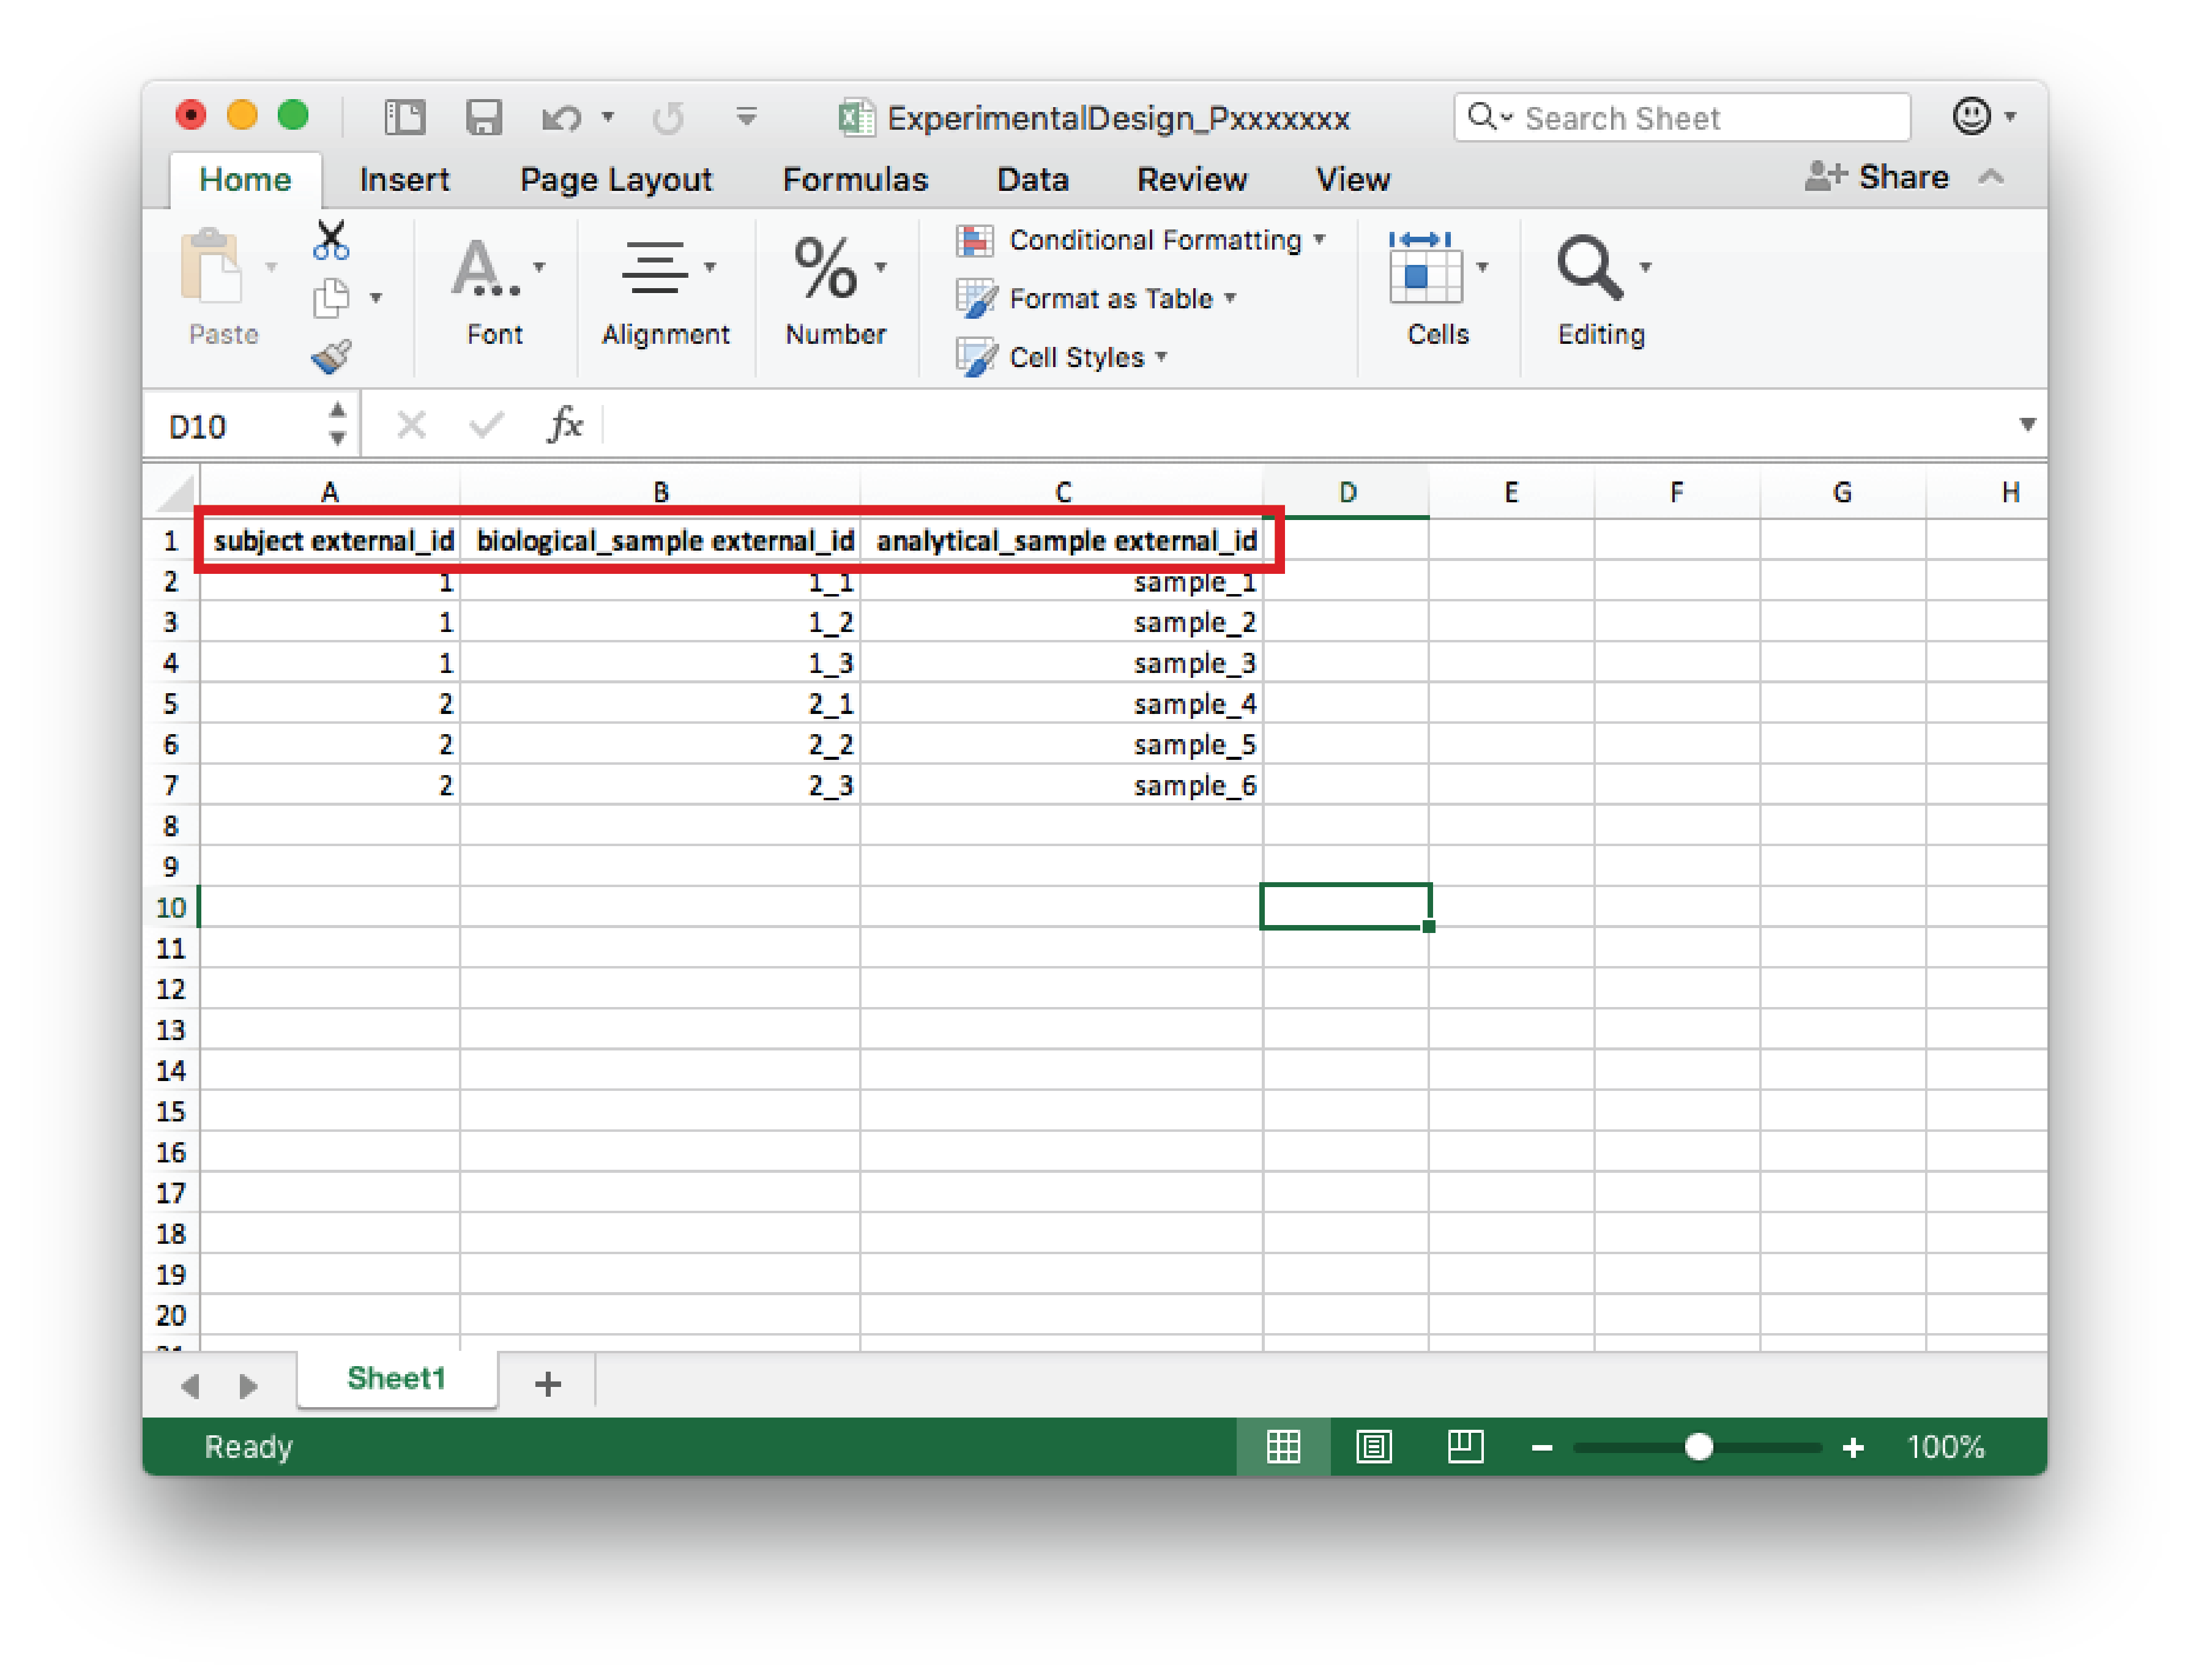
Experimental Design file example
Fill in the ExperimentalDesign_Pxxxxxxx.xlsx file with your subject, biological sample and analytical sample identifiers. Please double-check they are correct, this information is essential to map the results correctly in the database.
The ClinicalData_Pxxxxxxx.xlsx file needs to be filled in with all the relevant clinical data and sample information. For more instructions on how to fill in the file, please see Upload project experimental data.
To check your project in the neo4j database interface:
Open the Neo4j desktop app
Find the graph database in use and click Manage, followed by Open Browser (opens a new window).
In the new Neo4j window, click on the database symbol (top left corner) and, under Node Labels, click Project
At this point, you should be able to see all the nodes corresponding to projects loaded in the database.
To expand your project information, click on your project node and in the bottom of the window press the < symbol. Here you will find all the attributes of the project, including the project identifier (typically “P000000xx”).